- Back to Home »
- before and after , DIY , molding , office , popular »
- Before and After Party: Installing crown!
Hey all! It’s a new year, and that means some fun new projects up in here. In between the decluttering (I’m attacking the excess Christmas decor) I finished up a project I’ve wanted to do for YEARS.
I told you way back when in this post that I didn’t know how to cope or cut crown molding – so I’ve always used the corner pieces like these when installing crown:
And I really love them – they add a little extra architectural interest. And they fit right into the corners and make the installation of crown SO much easier. You just cut straight cuts and butt the crown up against it.
The only issue is the cost – they aren’t cheap. Easy, yes – cheap, no. (Um, this post is taking a very wrong turn.)
Anyway, I’ve been determined for years to figure out how to cut crown so I wouldn’t need the corner pieces.
When I mentioned this on Twitter and Facebook (because I was so excited!), I said I had figured out how to cope crown, which is the wrong terminology. Coping is actually a process of cutting out the shape of the molding so it fits snug into the other piece:
I did not do this. :) That’s still way over my head. But I did figure out how to cut the crown on my miter saw, which has eluded me for years! Yessss.
It was SO stinking easy. Seriously, I can’t believe it took me this long to figure it out. There are a few tricks to doing it right that I figured out along the way.
First of all, I used my compound miter saw. You do NOT have to have one – a miter box (like I used for years for my molding projects) will do just fine. It will just take more strength and endurance. :)
Because crown is installed at an angle, it changes things a bit. First of all, you need to place the crown at an angle on the saw when cutting it.
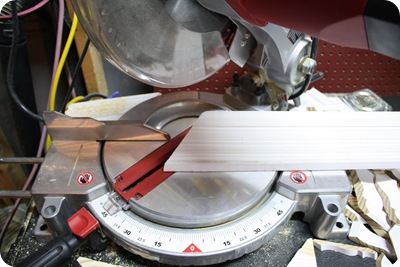
Here’s some pictures to help explain – for an inside cut, you to make sure the front is facing into the saw. This molding set up for a cut that will be on an inside left corner:
The front is facing into the saw, top on top, bottom on bottom.
Here’s what it will look like on the saw:
For a standard (inside) corner, you’ll want it set to a 45 degree angle:
You do the same thing for the right side of the molding:
You’ll notice the left of the molding on the saw is really the right side, and vice versa (because the back is facing you).
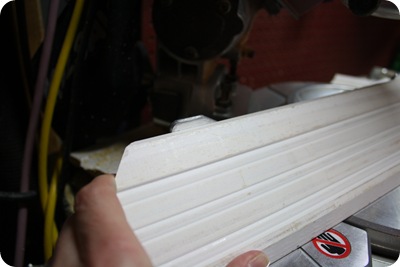
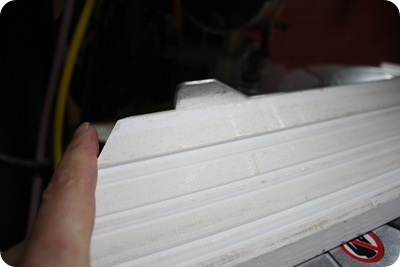
That’s it. Seriously, I waited how many years to figure this out? Here’s how your molding will look for an inside corner:
Notice you can see the edges of the wood? You want to see that, so when they go together up in the corner, they’ll meet up like this:
That’s the only tricky part, getting that angle right as you’re working around the room. You do want the back of the molding to be the longer edge, not the front:
Does that make sense? That part is huge! For an inside corner, it just won’t meet up the other way.
Installation is EASY – you’ll just need someone to help you hold up the pieces as you nail them in (thanks Dad!!).
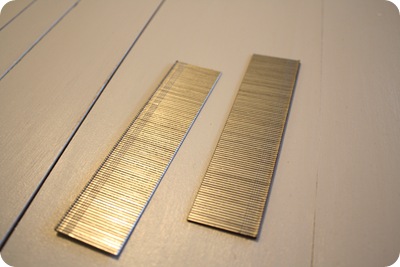
I used our nail gun and nails that were just over an inch long:
I put nails in the bottom of the molding every 18 inches or so, and you’ll want to get them into a few studs along the way. I don’t worry about that too much – crown isn’t too heavy (typically), so as long as you get nails in a few studs you’ll be good. I also put some through the top (into the ceiling) as well, just to secure it a bit more.
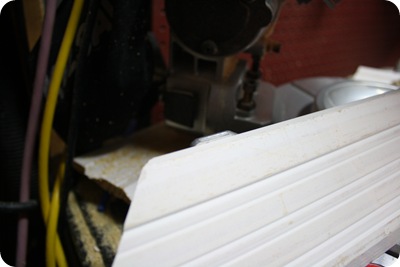
Something to think about as you have the molding on the saw is to watch how it rests. If you have it at this angle for one cut:
Make sure it’s not lower like this:
Or this:
For the other cuts. It will change how the molding meets in the corners.
If you do it (fairly) right, you’ll end up with this:
Don’t worry about it being perfect!! More on that in a bit!
One thing that’s held me back from figuring this out in the office was the weird angles at the doorway:
But we quickly figured out it was the exact same cuts, just at a 22.5 degree angle:
So, overall, this was WAY easier than I thought it would be. But, as always, I ran into issues I figure you all will too. So I want to mention them. So you don’t hate on me when you try it. :)
I’ve mentioned before that when you pick out molding, you’ll want to make sure it lays flat against the floor. Any pieces that are slightly bent or wackadoodle will give you issues when you install them.
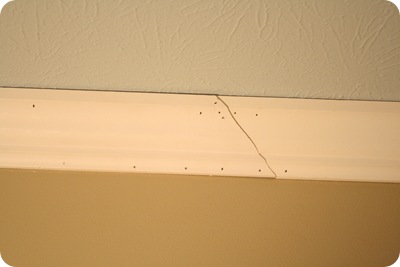
I knew one of mine was slightly off and used it anyway, and wish I wouldn’t have. Because it was bowing, it looked like this when I got it up:
See the eleventy billion holes? Yeah. That’s me trying to get it to go flush against the wall. It wasn’t. :) There was no stud at the point where there was an issue, the nails just weren’t grabbing anything. So I was left with a spot that didn’t match up perfectly.
I could have just taken it all down, cut a new piece and reinstalled everything. But I don’t roll like that. I hide, hide, HIDE all the imperfections I can. :)
Also, if you don’t have a piece long enough for a whole wall, you’ll need to meet up two – which is why I cut the crown at an angle above. Supposedly an angled cut hides more than a straight one – that’s what I’ve heard anyway. I’ve done it both ways, and over time, both need to be touched up as things settle.
So basically, do what you want. :)
That brings me to my next point – caulk is your BFF. Don’t fret if it looks like patoot after you install everything. Caulk and putty cover a multitude of sins. Here’s that same spot with caulk covering the nail holes and the crack:
When I paint, it will cover it up even more. Most people will never notice it. MOST. :)
You can see how the bowed piece didn’t meet up with the wall perfectly on the bottom:
Can you see the gap? I’ll caulk it so you won’t even notice it. Or maybe I won’t. :) It doesn’t bother me too much, but that’s me.
Finally, I was thisclose to done with the room, when I finished up the last corner – and the two corners didn’t match up. You need to make sure the angles of the crown (how it fits on the wall) are exactly the same as you go around. Does that make sense? If you are slightly off in the way you hold it up and install it, it won’t match up perfectly at the corners, no matter how well you miter those corners.
Again…CAULK IS YOUR BEST FRIEND. Serious. Remember, crown is up high. Way above your head. People can’t see the itty bitty imperfections. Only YOU do. Trust me. :)
So, for now, it’s done. My plan was to install a skinny trim an inch or two down from the crown, then paint it all out white (this gives the illusion of chunkier molding), but I’m going to wait to see how it looks with all of the board and batten before I do that.
By the way, doing that would hide even more imperfections. :)
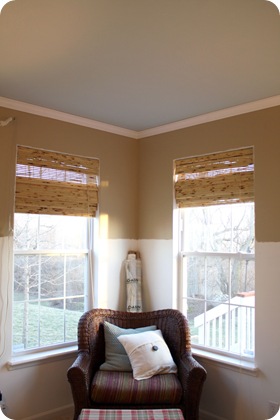
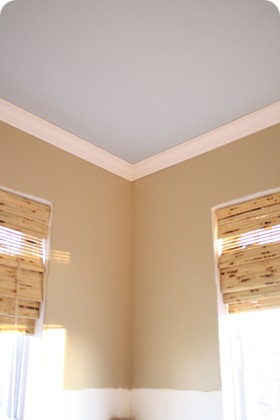
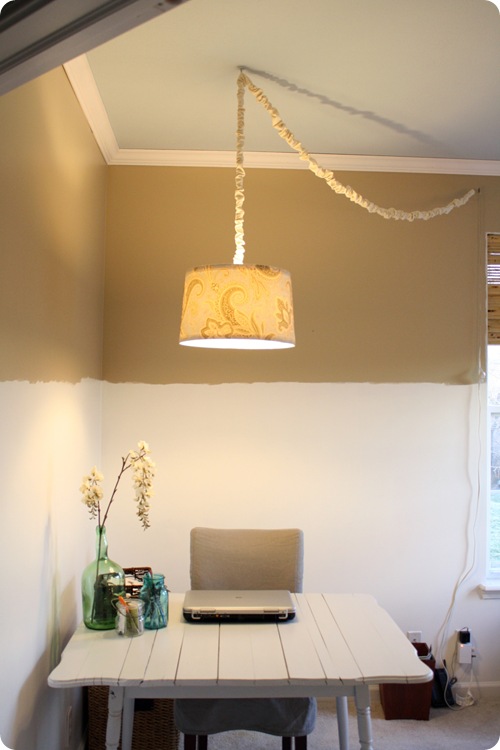
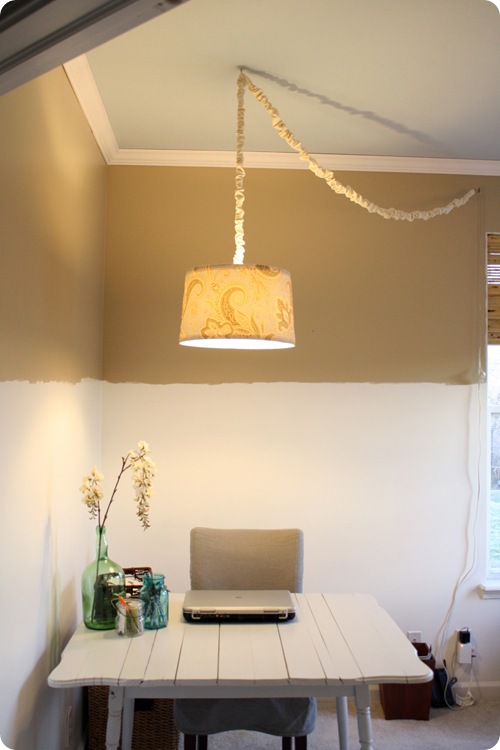
Here’s the end result!:
OH my, what a difference!! Isn’t that crazy?
Goodness, I LOVE MOLDING!! :)
So here’s my before and after for the month – the office before crown:
And after!
(Don’t worry – the cord will be hidden by the beautiful drapery fabric.)
I hope my pictures and instructions help and don’t make you more confused! Keep in mind, I only had to do inside corners. I haven’t had to attempt the outside versions yet. :)
And YES, you can do this with an $8 miter box and a hand saw, and YES, you can install crown with regular nails and a hammer. (I’ve done both in our dining room.)
It will just take you a bit longer to get to the finished product. :)
I can’t wait to see your before and afters for the new year! Remember, be sure to link up to your post, not your blog! And you’re welcome to add this purdy little button to your post:
Thank so much! Link it up Squeezays!!


